Wednesday, March 29, 2023

Editing the Directors Commentary

To begin my director's commentary, I first recorded the audio component, the script. When I recorded the script the first time, it came to be around three minutes and thirty seconds. When I was listening back to my responses and thinking about the visual component, I believe that there is more to be said about the editing process and the technology section can be divided into three components. Upon noticing this, I improved upon my script. I liked the way I opened the commentary, but the meat and information could be much more in depth. The script is written below.

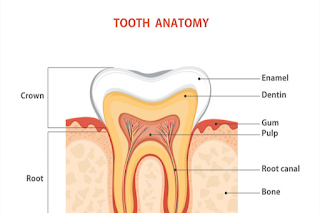
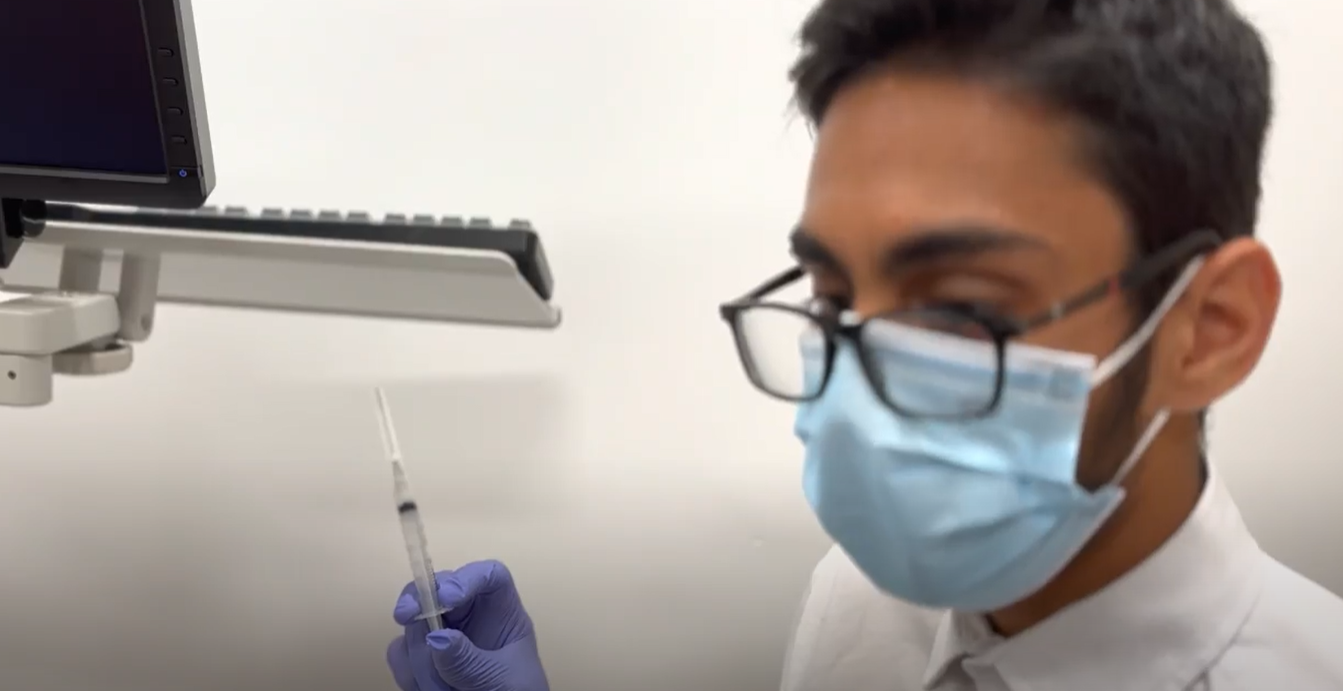
"The technology used are not all implemented for the same purposes. To me it makes the most sense to divide this section, this dentin, into three parts: hardware, software, and online. The moviemaking process first begins with the planning. As such, I will first expand on the online component. This included Blogger, the website where I posted during the eight weeks I worked on the production. Not only this, but it allowed me to gather my thoughts. At the very beginning of preproduction, I was unsure what story to fully flesh out, blogging helped me to decide. Secondly, the hardware. These included devices such as a mobile camera, microphone, and memory cards. The mobile camera I used was an iPhone 13 mini. This phone allowed me to blur and capture the story which I created. An additional bonus that only this phone could provide was higher resolution quality which I could not obtain without it. The microphone collected the background audio in the dentist office and was attached to the inside of the actors' shirts in order to obtain clearer audio. Memory cards helped to transfer the video and audio components to be losslessly compressed into the postproduction software. Software, in my opinion, is the most critical aspect of the technology. Software composed of Premiere Pro, Photoshop, and Audacity. In Premiere Pro I was able to import and edit the video. The original, unedited clips had much potential which had to be refined through Premiere. This single executable numbed the cavities or roadblocks that I had to deal with. There were two of note: the overexposure of the clips and the lack of blood when the teeth were removed. The first problem was solved by working with the interpreter in Premiere to lower the exposure and make the clips much crisper. The tooth removal scene was rather lackluster without eye candy. Therefore, using Premiere, it allowed me to key in colors with the Color Replace feature and make the shots look much more vivid and harrowing. Photoshop helped with creating the Smile Room logo used at the end of the introduction which helps to establish the theme and has brand identity. Lastly, but not least, Audacity helped to record the audio recordings for the Foley sounds and recording over the video. This was used in the scene where the needle was unsheathed similarly to a sword. Lastly but not least, Audacity helped to make the puncturing needle sound. These two sound effects landed itself to a horror convention of making the audio have more of an unrealistic soundscape in order to instill fear.
The pulp is the most important part of the tooth, if the pulp has a cavity, then the entire tooth falls apart. Similarly, my production skills developing is a critical factor in this product. Not only did I learn how to manage such a large project with many parts, but my editing and filming skills also improved. When I started the project, I was at first unsure how to proceed with the mountain of work that had to be done in order to successfully complete the video. For me, it began with planning, so I did not fall behind, like I saw other producers when they let work surmount. As well as this, I learned what it meant to create a cohesive story. At the beginning of my career, I tried to bunch abstract ideas into one video, but this made it so that my ideas were not conveyed as I had hoped. Therefore, I went for a much simpler concept which I could master fully. Throughout my postproduction process, I learned more about software than I had known before. Even though I am certified in Premiere, this production allowed me to delve into more complex editing and Foley as well as using more utilities of Premiere like the Color Replace and the Interpreter. What I believe that I could improve upon given another chance is to work on the SFX Prosthetics which I was deterred from due to its complexity. As well as this, I would like to have more time and work better around the schedule of the dentistry in order to have more time to film. In the end, I am proud of the work that I have produced and will allow the content of my film to be figured out on an individual basis. I would like to see what the viewers think in the comments and want to see theories."

With this newly improved script, I was able to begin working on editing the video as I have all the clips I need. For this director's commentary I want it to stand differently from what Peele and others have created, making the video component more engaging rather than having simple linear edits. I want to make the video feel more accustomed to its platform, YouTube. This is why I wanted to add the pause resume feature to the video. In order to do this without using video from online, I went to a YouTube video with a green screen. Then I screen recorded the pause and resume animations from YouTube. Now when pasting it into my video I used a feature called the Ultra Key. This allowed me to remove the green screen background. In addition to this, I completed around 1/5 of the total video component for the first CCR. It begins with a simple screen with the Smile Room logo and begins with the ending music of the opening. Then, while the director is talking, the video plays in the background. I am still unsure of whether I want the music from the opening to play in the background or to find some other music, but this is something I will do last. 

While I was attempting to add the Smile Room Sequence into Premiere, I ran into a technical issue. This issue seems to be a redundancy error. When I added the Smile Room Sequence into a similarly named new sequence, it stated that there was an error with the renderer. After a few minutes of troubleshooting, I learned that you cannot place a sequence into another sequence with the same name or the video will not render or export. This seems to be something that would work on other editing platforms but is an issue with this software. 

This is what I have so far and I am going to continue working to make this commentary the best it can be! In the next post, I will likely have the commentary done and have started working more on the interview. 

Monday, March 27, 2023

From Podcast to Director's Commentary

After attempting to create a Podcast on Spotify, I learned that I need an RSS and would have to link this back to Spotify in some way. This would require that I make a Spotify account for Podcasters and would also require that I post publicly. This is not something that I had in mind for creating the Podcast. Therefore, I will have to backtrack a little bit. Looking at the two questions, the answers are very visual. Originally, I had planned that the video feed of the Podcast would help to provide an extra medium to give my answer, so I decided that a Directors Commentary would work. All the visual material is already to my disposal as I still have all the original and edited film. Furthermore, there are plenty of examples online such as the commentary for the movie Get Out (2018) by Jordan Peele. 

In Jordan Peele's commentary, the direction and what was spoken about felt on the spot and raw. Jordan
Peele did not have a script. While I will be using one, I will be seeing how Jordan Peele went from one topic to another. This medium is a bit different from the interview in the fact that questions cannot be asked and the answers to the CCR questions must come up more naturally. The commentary begins with a cover page of the movie. I can use the Title screen as my movie cover. While the cover is shown, Peele introduces himself to the viewers and states that there are many spoilers and some background music plays during this period. The director plays the video and pauses while explaining. When the video plays, the original audio of the movie plays. What I found to be quite jarring, however, is that there is no signal for the pausing and playing of the video. While this is a small feature, I will be adding it to differentiate from other Director Commentaries. 

After seeing this example, I will create my own script for the Director Commentary. The questions that I will be "indirectly" answering are as follows:

  • How did your production skills develop throughout this project?
  • How did you integrate technologies – software, hardware and online – in this project?

Hey guys, this is Ryan Nadanam and I am the director of the film The Smile Room and we will be dissecting the movie opening. There are many spoilers here in this commentary, so I recommend that you pause this video in case you have yet to watch the movie. Of course this should not be your first viewing experience. This movie has many layers, much like teeth which have three layers, enamel, dentin, and pulp. This movie works on these three tiers which I will be showing you today. Enamel is the hardest and most outer level, it is the story on the surface about a Dentist who ruins peoples teeth. On the second level we have the dentin, the bulk of the teeth. This layer relates to the technologies which made the film possible. Lastly, but most importantly, we have the pulp. This layer relates what I learned through this process and how it impacted this film. Of course most people who watch the movie understand its outer layer. Today we are here to dive deeper. Lets begin with the dentin, the tech behind the film. 

While the technologies are all different in aspects such as Premiere Pro being software and Blogger being online, they worked together to create a cohesive project. Firstly, I used Blogger, the online site where I posted the blogs during the eight weeks. Not only this, but it allowed me to gather my thoughts. For the production process, I used an iPhone 13 mini. This phone allowed me to blur and capture the story which I created. An additional bonus that only this phone could provide was higher resolution quality which I could not obtain without it. Premiere, Photoshop, and Audacity all helped me during the post-production process. Premiere allowed me to edit the video. The original, unedited clips had much potential which had to be refined through Premiere. Photoshop allowed me to create the Smile Room logo which was used in the video. Lastly, but not least, Audacity helped to record the audio recordings for the Foley sounds and recording over the video. This was used in the scene where the needle was unsheathed similarly to a sword. Technology played a critical role in making the product more cohesive. 

The pulp is the most important part of the tooth, and as such my production skills developed so much throughout the course of this project. Not only did I learn how to manage such a large project with many parts, but my editing and filming skills also improved. When I started the project, I was at first unsure how to proceed with the mountain of work that had to be done in order to successfully complete the video. For me, it began with planning so I did not fall behind, like I saw other producers when they let work surmount. This ensured that I did not stack work for the following weeks. As well as this, I learned what it meant to create a cohesive story. At the beginning of my career, I tried to bunch abstract ideas into one video, but this made it so that my ideas were not conveyed as I had hoped. Therefore, I went for a much simpler concept which I could master fully. 

There really is so much that went into the production, but I am leaving the content of the film for you to theorize. Thank you for listening. 

This is what I have for my script, and I will work throughout the week to edit and record audio and video for the commentary. 


Sources:

https://www.youtube.com/watch?v=eG5uT00SWNA 

Friday, March 24, 2023

Working on the Interview

Today I will be working on my first CCR. For the interview, the host will first be shown sitting down and will announce me. A crowd will be heard clapping me to my seat where from offscreen I sit down into a chair on screen. I will be introduced as the creator and actor of the doctor in the hit Smile Room movie. 

The shows name will likely be "Guru named Muru." The image below is my script. 


I may have to shorten my script as the responses are quite long. Other than that, all I have to do for the interview is film and edit it. With the editing being much more linear and by the script, it should be done in no time.

Bye for now!

Wednesday, March 22, 2023

CCR Mediums

Today I decided for my CCR to do an interview surrounding the two most important questions listed. The questions are the following: 

  • How does your product use or challenge conventions and how does it represent social groups or issues?
  • How does your product engage with audiences and how would it be distributed as a real media text?


My first CCR posting will likely be an interview. After watching past CCR's this one appealed to me as it is both creative and can look professionally produced without having to edit too much. In the interview, I will likely take the persona of an eccentric creator who took up the role to play the dentist and is getting interviewed about my involvement in the movie. 


The interview will go as follows: I will sit down from offscreen, be introduced and greeted by the interviewer, and answer the questions that the interviewer has for me. I will state that I have little time for the interview and the interview will end with me leaving for the podcast that I have to create. 

In this way, both the Interview CCR and the Podcast CCR will both be interconnected in this universe that I have created. For the podcast, I will create an image on Spotify for the thumbnail and will record the questions with some Foley sounds to make the Podcast more dynamic. 


The Podcast CCR will have to do with the following questions: 

  • How did your production skills develop throughout this project?
  • How did you integrate technologies – software, hardware and online – in this project?

These questions do not require as much imagery as the questions above and would work best in the Podcast setting. These questions are also more subjective as to how my skills developed and, therefore, lends itself to working well in a podcast. 

In the next post, I will be making the script for these two mediums and will be working on producing the two CCRs. 

Monday, March 20, 2023

CCR Planning Part 2

In this post, I will be answering the last two questions of the CCR questions:
  • How does your product use or challenge conventions and how does it represent social groups or issues?
  • How did your production skills develop throughout this project?

 1. Conventions for horror which my product uses a visual style of dark colors like dark reds, blues, and blacks. These colors through mise en scene link to evils and danger. Teenagers are represented in the typical horror manner as being immature. In this production, "immature" is represented by the relative ease of the dentist to make Logan the victim. Conventions which were challenged in the production were that the story follows a "hero" or protagonist. This story will follow the antihero who commits the acts of malpractice. 

The story represents social groups in that it represent an underrepresented group in the media world. From my research, I learned that only 5.3 percent of characters in movies produced by large media companies are Asian, even lacking the distinction to which type. This is an issue which is brought up by the main characters of the opening being both Indian with the majority of the cast being non-White. As well as this, in many productions, Asian characters have no lines, are nameless, faceless, and have no story. These characters are also given no motivation. This, is a trend which is challenged through my production. It gives the Asian characters a story, motivation, and follows their perspective throughout the story. 


2. My production skills developed so much throughout the course of this project. Not only, did I learn how to manage such a large project with many parts, my editing and filming skills improved. When I started the project, I was at first unsure how to proceed with the mountain of work that had to be done in order to successfully complete the video. For me, it began with planning so I did not fall behind, like I saw other students when they fell behind on blogs. This ensured that I did not stack work for the following weeks. As well as this, I learned what it meant to create a cohesive story. At the beginning of the school year, I tried to bunch abstract ideas into one video, but this made it so that my ideas were not conveyed as I had hoped. Therefore, I went for a much simpler concept which I could master. 


My production skills developed as I learned many new uses to Premiere Pro such as Color Replacement and how to make scenes look less overexposed. My filming skills also improved, learning how to frame my shots and ensure that there were no jarring jump shots. I learned how to make the most of the technology that I had and made shots appear as they were breathing. Prior to this, I would not dare to touch the blur feature and would have mostly still shots. In this, while the shots continued to be still, there was reason behind it. 


In my next post, I will be deciding what mediums to make my CCR.


Sources:
https://www.statista.com/statistics/641132/ethnicity-film-characters/

https://aapr.hkspublications.org/2022/05/16/media-matters-why-asian-american-representation-in-media-is-a-social-justice-issue/


Friday, March 17, 2023

Editing (Part 3/3)

 The final editing day. Today I got the second half of the video done. I made some more Foley sounds, put together a more cohesive second section to the video, made intro credits, and surpassed some obstacles. 

First, the Foley. Listening back to the injection sound, I felt as though it was a bit flat with just soap sounds, so I added depth to it by crushing up an apple and squishing it to create a more harsh sound to compliment the soapy sound. Now it sounds as though the needle is really going deep, while not showing it. As well as this, there were some sections where Foley was required to make it look like I was really working on the teeth. There was a section with a scraper where there was no other sound, so I used Foley to make it more interesting. The scene had a scraper being used to remove the plaque in teeth, so I got a plastic stick and dragged it across the table, making a scraping sound. 

When I was editing the tooth removal scene, it looked unrealistic without any blood. I attempted to change that. I saw how the tooth had a variety of colors on it which would be the same on the pliers. With this in mind I used the Color Replace feature on Premiere. This was my first time using the Color Replace tool although I am certified with the platform. I started by using the color select to choose which colors to replace. It was difficult to change the color of one aspect of the screen, because with too much allowance for similarity of color would make the wall red. I found that the sweet spot was between the similarity of 3 and 6. I did this for three scenes. The setback of this method to make the tools look bloody is how the color does not stay in the same spot respective to the pliers and tooth as when shadows move, the colors will change. However, I believe that this method works better than what I had originally planned with ketchup because it looks much more realistic on a freeze frame. 

When I was editing the clips for the second half. I found that I filmed clips which made the pacing of the second conflict a bit fast. Therefore, I made use of fast pace music to make it less daunting in comparison to the pacing of the first half of the film. As well as this, when transitioning from the needle scene to the scene of the kid in the waiting room who is confused by the sound in the Smile Room, I decided to make the soundscape a bit unrealistic as the sounds of needles are not as loud as it is made to be in the film. This is specifically done in order to add novelty and make the shot look more harrowing than it actually is to add to the aspect of horror. As well as this, I added a muffle effect called LowPass which made the sound lighter and appear as though it was through a wall. 

I acted on my plan for the intro credits. I had some problems trying to import Futura into premiere as it did not take the font format that I was trying to import. However, I chose the next best thing. For the intro credits, I made them span the first three scenes which are slowly paced. For the credits I made them a bold black with a red outline to juxtapose the more blue background. I also gave thanks to Le Orthodontics as my last introduction credit. 

The reason for the relative darkness of this next frame is something that I will be explaining. When attempted to export the film to send to friends to critique and give feedback for. I found that it was very very overexposed. This is a problem. The scene was way too white to give the tone of horror. It is best exemplified in this scene where my shirt almost blends into the background due to this overexposure. This, I learned, is a problem with only the iPhone 13 and 14 cameras with Premiere. An oversight on either Premiere or Apple's end. In order to fix this, I had to go through each shot and select Modify. After this, a pop-up would appear and I would select Interpret Footage. After this, I would change the Color Space Override to a lower number. This, while not a perfect solution, worked to make the scene more crisp and less bright. On top of this, it had the added benefit of making the shot a bit darker, which I found added to the tone of a scary, isolated room. 

Lastly, to finish the video, I made a final revision of the Smile Room logo which would be the credits. I would change the color of the smile to white to make it different from the black background on Premiere. As well as this, I used my knowledge of Photoshop in order to make the font look glitched. This contrasted the logo which was shot in the film and adds to the theme. The two yellow O's also look like cavities. 

Overall, today was a success. I finished the video and am excited to show it to my peers. In the next post, I will be answering the final two CCR questions that I can now answer because the video is complete. 


Wednesday, March 15, 2023

CCR Planning

 Today I am going to answer the following CCR questions:

  • How does your product engage with audiences and how would it be distributed as a real media text?
  • How did you integrate technologies – software, hardware and online – in this project?
1. The target audience, which I defined in my first few blogs are males ages 15-25. From research conducted in a study with 2210 respondents, nearly 48% of the total respondents in this study of those 18 years or older found that they watched horror movies within the last three years at least. Furthermore, at least 35 percent of all men surveyed stated they had been to a theatre to watch a horror production, going the extra step. My product engages with the audience, firstly, due to the matching theme in the type of production. My film, by following genre characteristics of using blur techniques and transitioning the audience from more passive to active members while watching, engages the audience. Not only this, but the production also uses atmosphere in order to create tension, which further engages the audience members into the scene. 

The product as a real media text would be distributed to distributors such as YouTube and local film festival events for horror productions such as the FilmGate Short Film Festival. Of the internet users in just the United States, the percentage of people on YouTube ages 15-25 is 77 percent. On top of this, in a poll run by CBS, almost 71 percent of Americans under the age of 35 say that they like scary movies. 

With this data, and knowing that much of the American youth uses YouTube on a daily basis, this distribution method will work to spread the film to greater audiences. The FilmGate Short Film Festival aims to promote evolving film and media producers and attracts a number of sponsors to produce the full films. This festival will allow for the production concept to spread and for it to possibly gain sponsorship. 

2. In my production I integrated the following technologies: Premiere Pro, Photoshop, Blogger, Audacity,  an iPhone 13 mini for a camera, and an assortment of props. 

While the technologies are all different in aspects such as Premiere Pro being software and Blogger being online, they worked together to create a cohesive project. Firstly, I used Blogger, the online site where I posted the blogs during the eight weeks. Not only this, but it allowed me to gather my thoughts. For the production process, I used an iPhone 13 mini. This phone allowed me to blur and capture the story which I created. An additional bonus that only this phone could provide was higher resolution quality which I could not obtain without it. Premiere, Photoshop, and Audacity all helped me during the post-production process. Premiere allowed me to edit the video. Photoshop allowed me to create the Smile Room logo which was used in the video. Lastly, but not least, Audacity helped to record the audio recordings for the Foley sounds and recording over the video. Technology played a critical role in creating the product. 

In the next post, I will be answering the last two CCR questions. After that, I will need to start making a script for the Podcast and making a Presentation for the video. These answers will have to be changed in order to make them more digestible in the format they are presented in and so they sound more personal. 

But this is a job for another day. Bye!

Sources: 

https://www.filmgate.miami

https://www.cbsnews.com/news/scary-movies-opinion-poll/

https://www.zippia.com/advice/youtube-statistics/#:~:text=YouTube%20has%20over%202.3%20billion,million%20hours%20every%20single%20day.

https://www.statista.com/statistics/1342707/horror-movies-theater-viewing-gender-united-states/#:~:text=As%20of%20October%202022%2C%20approximately,added%20up%20to%2021%20percent. 

Monday, March 13, 2023

Intro Credits and Fonts

 Hello! Before I finish editing my project, I need to consider what fonts I am going to use for the introductory credits. Also I have to remember that these credits are at the beginning of a complete film and cannot by any means be scrolling. Furthermore, I can only use a few fonts which have to encapsulate the theme of the film. For the credits, I also want them to be interactive with what is going on in the screen. If my hands move into the credits, then they disappear, something of that sort. 

But first, the font. I am thinking of a more simple font in order to match the perceived orderliness of the dentist office. This will serve to juxtapose what happens to Logan, something vicious and cruel. Taking inspiration from what started this journey, Jaws, I am considering using the font Futura. 


Futura is a bold font which is easy to read and has straight and rigid lines. There are not any flourishes in the font such as in the most common Times New Roman, a serif font. However, what I am contemplating against is that while this juxtaposes in tone, a font that agrees with the tone would hit the nail on the coffin for the tone. This is something that I will have to consider.


For the introductory credits, I want to make use of graphics. In Premiere Pro, these can be imported or created. When the tooth falls into the bin, I want the scene to cut to black with a red trail trail following the tooth during its descent. Then the words SMILE ROOM would be spelled out onto the black screen, all the while Logan's screaming can be heard. This would be the ending of my opening and would serve to tie together this scene, showing how in the context of the dentistry, this patient is just one meaningless member. 

If the story were to be continued, it would likely follow the dentist. For the spelling of the SMILE ROOM, I will be using the logo which I created before, but adding making it more horror-esque. 


More on the topic of the introduction credits, I will be adding the following information: director, producer, writer, cinematographer (Sean), editor, major actors (Reuben), and last but definitely not least Le Orthodontists for allowing me to film at their Weston location. These credits will appear in different sectors of the screen to make it appear more dynamic. 


Sunday, March 12, 2023

Editing (Part 2/3)

Hey guys, its been a day since I last worked on the project and today I was dedicated to getting some Foley sounds done. On top of this, I wanted to choose some royalty free music that I could use in my video. 

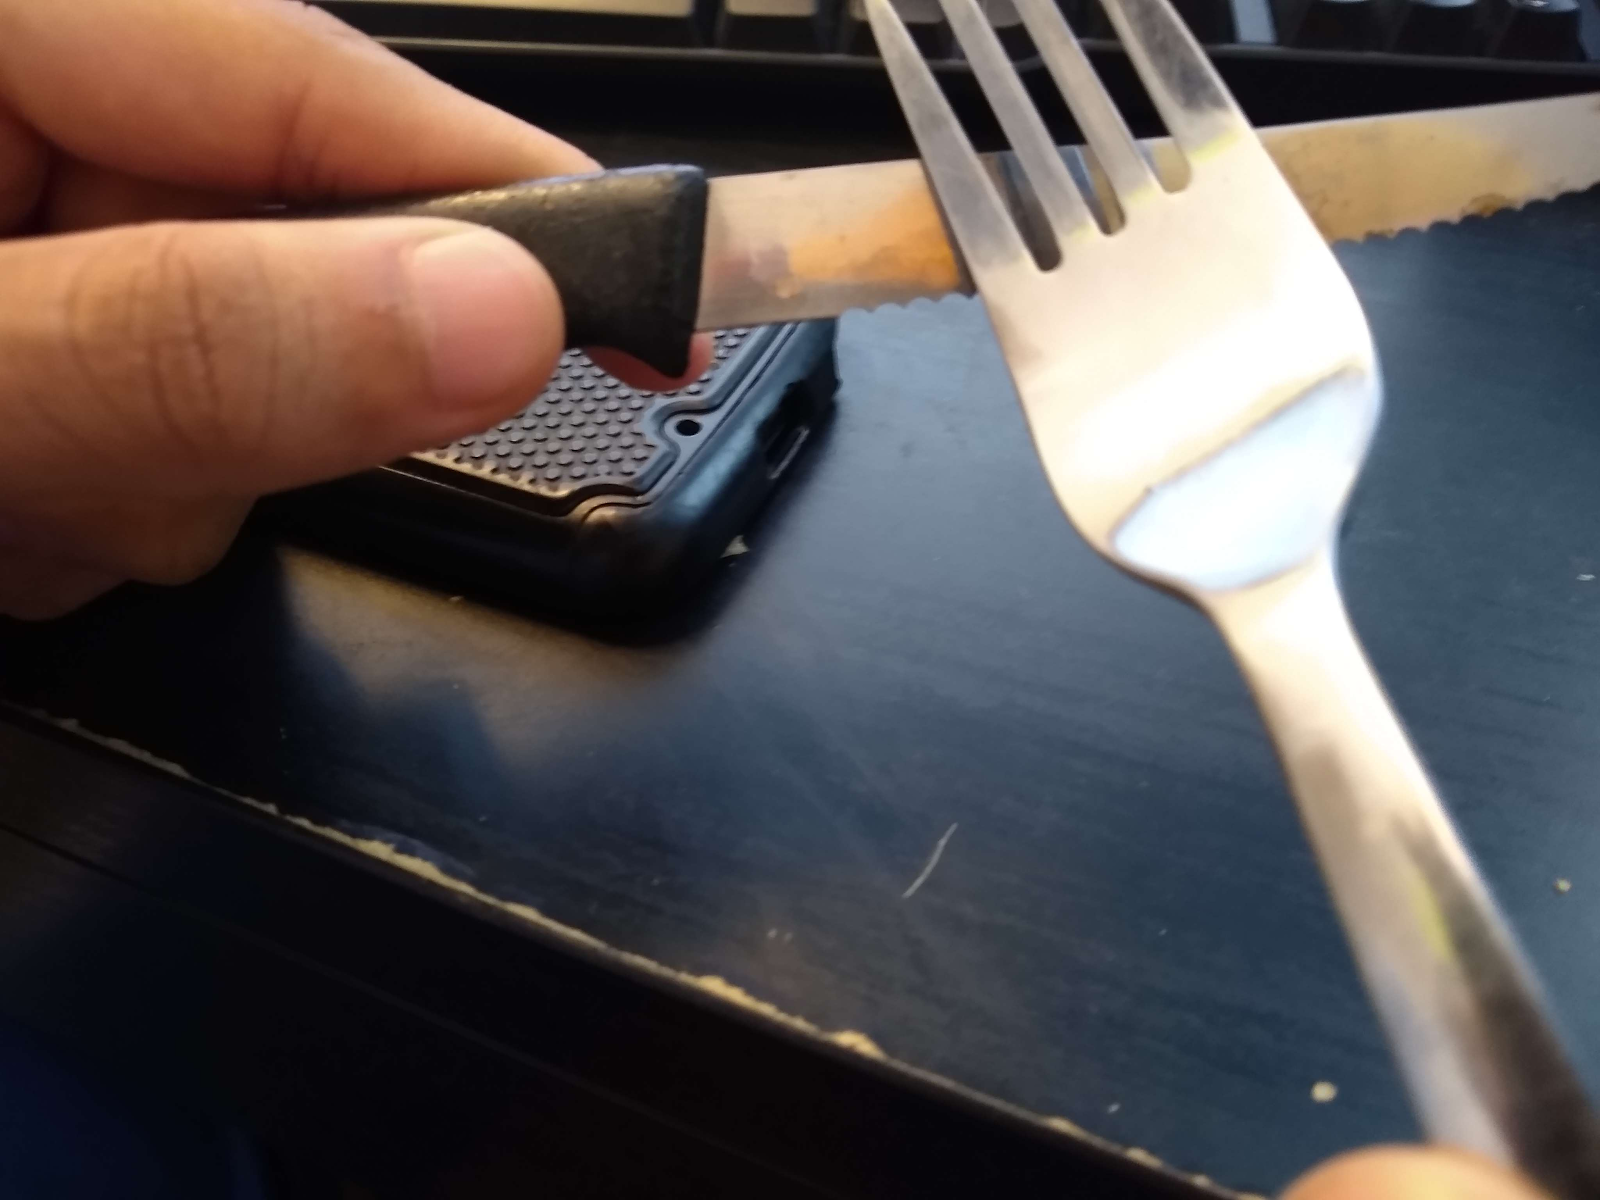
First things first, I made my Foley sounds. For the sound of the needle coming out of the cover, I imagined it would sound quite like a sword being unsheathed. Therefore, I used a knife and a fork, gliding the fork over the smooth end of the knife to create a nice sharp sound. In the photo to the right, you can see the process. The phone on the table was the recording device since I do not have a phone. This means when I am editing I will have to use the "DeNoise" feature to remove the background sounds. 

On top of this, for the sounds of a tooth getting violently ripped out, I used an apple to create the sound. I took a large bite into it which got the right sound I was looking for. When I reached out to Litvinovsky for the music, they responded. Its just that the response I got was not the one I was hoping. 


I learned that to use this music without having it be copyright stricken, I would have to pay around 150 euros in order to obtain a license. This would not do, so I dashed the thought of using classical music by this creator. Next I perused the internet and found a video called "♫ Sad Spooky Piano Violin Music ♫ - Royalty Free Horror Music - Lost But Not Forgotten." This song is a simple piano play softly which can play during the beginning of my clip. However, I still needed some suspense music. This I got from YouTube the video called "Horror Background Music for Videos - Atmospheric Music - scary, suspenseful sounding." This song has an upwards pitch which screams anxiety. This I used for when the shot was going into the mouth. While I have yet to find a final song to bring the opening together, this I will do on my final editing day. As well as this I am retrieving audio clips of Logan screaming to make the tone more tense. 

While everything was going good, what happened to me when I attempted to save was yet another obstacle. When I attempted to save, I got an error from Premiere saying it had to close. This is a bad sign. A sign that my settings for saving every 1 minute had not done its job and that I was going to lose my work. Lo and behold, my clips and Foley sounds were gone. I had to rearrange all the files and put them all back together again. As well as this, I would have to remake all my Foley sounds. After this mishap, I was able to save my redone work. 


Here is my timeline as of current. I still have yet to complete the music for the rightmost portion. This I will likely do on Friday. In addition to this, I will have the video exported by Friday and will begin contemplating what exactly I will do for the CCR. 

Until next time!

Saturday, March 11, 2023

Editing (Part 1/3)

 Today, I started editing the project. The first thing I had to complete was to import my files. Here is where I hit my first roadblock. When attempting to import my .MOV files to Premiere Pro, it only dragged over the audio to the sequence. I was very confused at this because in the Source Monitor and Bin, I could view the video, it just couldn't be put into the sequence. To try to fix the problem, I tried to convert the file format from .MOV to .MP4, which I have heard sometimes resolves problems with the encoders in Premiere. One by one, I transferred the files over to an online converter and redownloaded each clip. The same thing occurred. Still puzzled, I went to the internet in search of a solution. What I found was that this issue is a problem which Premiere has had for over six years. This issue stems from the software itself creating new productions with the wrong initial settings. 


While this screen appears to not have any issues, looking at the alignment of V1 tells otherwise. The video is not synced properly. To fix this, I dragged down the grey V1 to the blue V1. Then by selecting the option to show the video resolved the problem. This was a setback in that it took longer to get started than I had anticipated to begin editing. 


I started to drag all the files into the sequence. This took lots of time just to order the shots in the right way. Then I had to shorten each clip as there was a starting and ending buffer on each one. After this was completed, I had a working video. Looking at the brightness of each scene, it changed the tone I wanted to portray as each shot was well lit and bright yellow. To fix this, I used the Lumetri Color to add more blue to each shot.


The lighter shot is the one before I edited the Color saturation and amount of blue which would appear. The shot after looks much colder and the needle can be seen better as there is more contrast. This coloration is present in the Smile Room. In the waiting room, it will be more lively to show further contrast between the impending danger of Logan and the relative safety of those in the waiting room. 

What I need to do next is add some music, as well as make the transitions a bit more seamless. This will be what I will work on tomorrow. Finding music which fits the scene will be quite difficult, but, if pulled off correctly, will make the scene much more dramatic. As well as this, I will be making Foley sounds for the needle poking Logan and the sounds of teeth getting ripped out with sounds of flesh tearing. I have many ideas for this, but it will have to wait until tomorrow. 

Friday, March 10, 2023

Filming

In this short interval between my last post, much has happened. Firstly, we filmed. On Tuesday, we (me and a few friends) went to Le Orthodontics arrived at 5:00 PM. There were still some people having appointments at the time, so we waited thirty minutes and were allowed to film. When we were allowed to film, the dentistry allowed us to film in a separate room, which I was very grateful for as I wanted the space to feel more isolated for the mood of the scene. In the room was a chair, computer, and a table. It was very cool to be operating within a dentistry with the roles reversed. I would be the dentist. 

Before coming to the dentist I brought a bag which had the teeth, tools, and gloves. As well as this, I dressed in a sterile white shirt. What I found to be convenient was the positioning of the chair to the door. In many psychology videos, when the subject during an interrogation has the authoritarian force between the door it lowers their morale, which is important to show in a horror opening.


While I was filming, we decided to use my friend Rueben's phone. It was an iPhone 13 mini. I had not prior had experience with such a phone so my other friend Sean filmed for me as Rueben and I acted. I was suggested that we use the automatic rack focus tool. This would make the shots breathe and appear as though the shots are more dynamic. We then implemented this into the shots.


As can be seen in this shot, I am blurred a little as to focus the shot onto the needle which just appeared onto frame. 


What I would have liked to done a bit better if I were to film again next time would be to have more time so I could be all the shots perfect, with various angles if I do not like the ones I have. However, I would call the overall filming day to be successful. Looking back at the footage, only one of the shots did not come as clear as I had hoped, but I took two angles which allows me to edit out the imperfection. 


For the editing, I will need to add a splash of red as I choose not to dress the teeth in ketchup in fear that it would look tacky. This would be one of the shots that I can use a simple mask in order to make the shot look more brutal.


In the next post, I will be editing the overall film and then contemplating what I will do for the CCR.  

Sunday, March 5, 2023

Shots List & Music Discussion


Today, I am creating a shots list for when I film on Tuesday. This is going to be based on the most current script version. In the shots list, each shot will be given a time frame to shoot for. 

1.Dentist placing gloves on both hands and scraper out of bag. MCU. 5 seconds. Shot tilts up and remains still until the scraper exits the scene.
2.CU shot of Logan looking to the right (which will be the left on the film) and then looking down. 5 seconds.
3.CU Tilt down as the scraper is put down on a sterile paper. 
4.Same shot with the dentist placing the mirror down and the flosser.  Combination of 3 & 4 should be 10 seconds.
5.Dentist lowers chair. MS. "Open up." . Picks up mirror and scraper and moves to mouth of Logan. 7 seconds.
6.CU on Dentists face with hands in the bottom of the shot. 3 seconds.
7.CU on the patient with the Dentists hands up to mouth. 5 seconds.
8.CU on the mirror showing teeth. 3 seconds. TEETH WILL BE FINE.
9.MS OTS showing Dentist back away from patient. "It seems you have a cavity below the right molar on R16. We are going to have to do some work on it." 7 seconds.
10.MS OTS showing Logan's face. "It's not painful is it?" 3 seconds
11.Low Angle OTS on Dentist standing with needle in hand. "No, shall we?" 5 seconds.
12.OTS Logan nods. 2 seconds. 
13.MCU of Dentist leaning forward to Logan. "You'll just feel a little jab as the needle goes in. Then nothing to worry about." 5 seconds.
14.CU on Logan's face as needle draws closer. 3 seconds.
15.CU on Logan's eyes as they close. Shaky breathing. 3 seconds.
16.Black screen . Logan groans and can hear the sound of squishing gums. 7 seconds.
17.MS Mother sitting in the waiting room on her phone, looking up as she hears a groan 3 seconds.
17.1.MS POV of door saying "SMILE ROOM." 4 seconds.
17.2.MS of Mom looking back down. 2 seconds.
18.MS Dentist working on Logan until he states "On second thought, we are going to have to pull it out." 5 seconds.
19.Front facing MS of Logan trying to get up as he states "No, wait!" 3 seconds.
20.MS shot of the Dentist pushing Logan back with one arm and grabbing pliers. 5 seconds.
21.CU of pliers up to mouth and Logan screaming. 5 seconds. 
22.MS of pliers twisting. Sound of tearing gums. 5 seconds. 
23.CU on pliers on table dropping two bloody teeth into bin. 5 seconds. Crying sounds.
24.CU As teeth fall into box, screen cuts to black. 3 seconds.
25. SMILE ROOM LOGO. 5 seconds.

For the story I believe that it will be about the Dentist and his evil want to ruin smiles through malpractice. This is why for the mirror shot, the teeth will not have any problems and will be removed regardless.

 According to this shot list, the final film will be approximately 1:53 and on top of this, I have an extra scene which I can film in case I feel I need more content. With this shots list in place, I can get all the shots I need and I will print this out prior to filming as a checklist to know what I am going to shoot. 

For music I have decided that I want to use classical music with higher pitches to help create the tone of suspense. This coupled with the slower paced scenes will fully encapsulate the uncomfortable feeling of the dentist and exemplify the highlights of the film. I have made some findings such as tracks from Litvinovsky. I will need to email info@halidononline.com in order to ask if I can use some tracks for my music video. I will see what they have to say and will continue searching for music.

(Litvinovsky, Tales of the Magic Tree Soundtrack Cover)


Saturday, March 4, 2023

Learning About the CCR & Continuing Story

Today I learned more about the Creative Critical Reflection for after the project. For the CCR I will need to create two presentations which reflects on the entirety of the process for creating my two-minute opening. In these two presentations, I need to respond to the following questions:
  • How does your product use or challenge conventions and how does it represent social groups or issues?
  • How does your product engage with audiences and how would it be distributed as a real media text?
  • How did your production skills develop throughout this project?
  • How did you integrate technologies – software, hardware and online – in this project?
For my two presentations, I am thinking of making an enhanced podcast and making a presentation with a voiceover. For the first two questions, I would do the presentation as these two questions require more visual responses. In the challenging conventions question I will be starting by discussing genre conventions, then which I decided to embrace or reject and why. I will end the answer with talks of how I implemented representation. For the second question, I will discuss how I arrived at the target audience, production choices, and how I plan to make the film available.

For the second two questions I will do the enhanced podcast. These answers will be less in depth as there is a ten minute total that I cannot go over for the two presentations. In the last two questions I will go into how I approached the project, where I started and how I ended, and discuss what technology I integrated and why. 

In the podcast, I will conclude about what I learned over the eight weeks, what I would have done differently, and how I could improve in a following project. 

After this research, I worked to solidifying my story. I acquired a needle for the shot scene. I am super excited on how this will pan out. As well as this, I found several teeth which can be used in the film. These will all be used to create an unnerving experience watching the dentist. I believe that the rest of the story should follow the path of the dentist opposed to its victim. This would lead the story to have more horror elements if it were to be fully created. 


I will be collecting more of the props. I need to get a handheld mirror for the last scene and need gloves for the dentist. When filming the shots, I will get three versions of every shot in order to have variations of the shots so I can pick and choose what to work with. 

In the next post, I will create a more encompassing shots list and discuss what I will be doing when I film.

Wednesday, March 1, 2023

Film Date Schedule & Refining Story

For today's tasks, I scheduled with the orthodontist office the date for which I am to film. After, I created a game plan for what I am going to complete prior to the filming date to ensure that everything goes smoothly. I am going to notify my friends for people who can be actors and get the props in order. I am filming on Tuesday at 5 PM.

Thinking back to the story, one thing does not make sense. When the mother goes down to kiss her son on the forehead, she is able to see his face without any mouth and scarring. This is a problem. Typically, the mother would respond with a blood curdling scream, but this is not the angle that I want to go. Instead of tackily dodging this oversight. I can make this one of the conflicts. For the rest of the movie, it is only the person whose mouth is removed that is aware of this. This can be done by changing the script for when the boy tugs on his mother's skirt or shirt to which she responds with "Yes, dear?" The shot will give a POV of what the mother sees: her sons regular face. This may require changing the final scene with the bloodied mouth on the wall. I believe that this solution is a good one as it sets up the challenge the main characters will have to face in the future of the movie. 

I will be editing the storyboard to account for this as well as for the SFX prosthetic. After attempting to use the latex to create a prosthetic, I found that the foundation that I was using was not the right color. As well as this, the scarring effect of the prosthetic looked unnatural. These two reasons will have me change up the script a bit in order to make the scene not reveal the face of the boy, but instead, have more scenes showing the gory process that the boy underwent. 

For the story, I want to change it so that the audience gets to see the process, but the gore is not revealed, leading the effect of the dentists' practices be left up to the imagination of the viewers. As well as this, it will have lots of auditory cues for what the tools are doing to the boy. The horror movie which I am taking much of my inspiration for this change is The Dentist from 1996. This film used lots of different techniques with sound in order to create an unnerving feeling. Tools that are used in the film are pliers, razor blades, mirrors, scalpels, and needles to instill fear in the squeamish. Not only this, but with dramatic instrumental music, Foley sound effects for sounds such as inserting a needle or twisting a tooth out, it adds to the tone of scenes. I will be using similar techniques as used here.


This script utilizes this new knowledge that I have and will be much easier to produce. Furthermore, I can have more realistic looking scenes. In the next post, I will be continuing to finish the preproduction parts and will be continuing to revise the script and storyboard.

Film Opening

This film opening has was an interesting experience for me. This is because I was actually allowed to film in a dentistry. It was very cool ...